
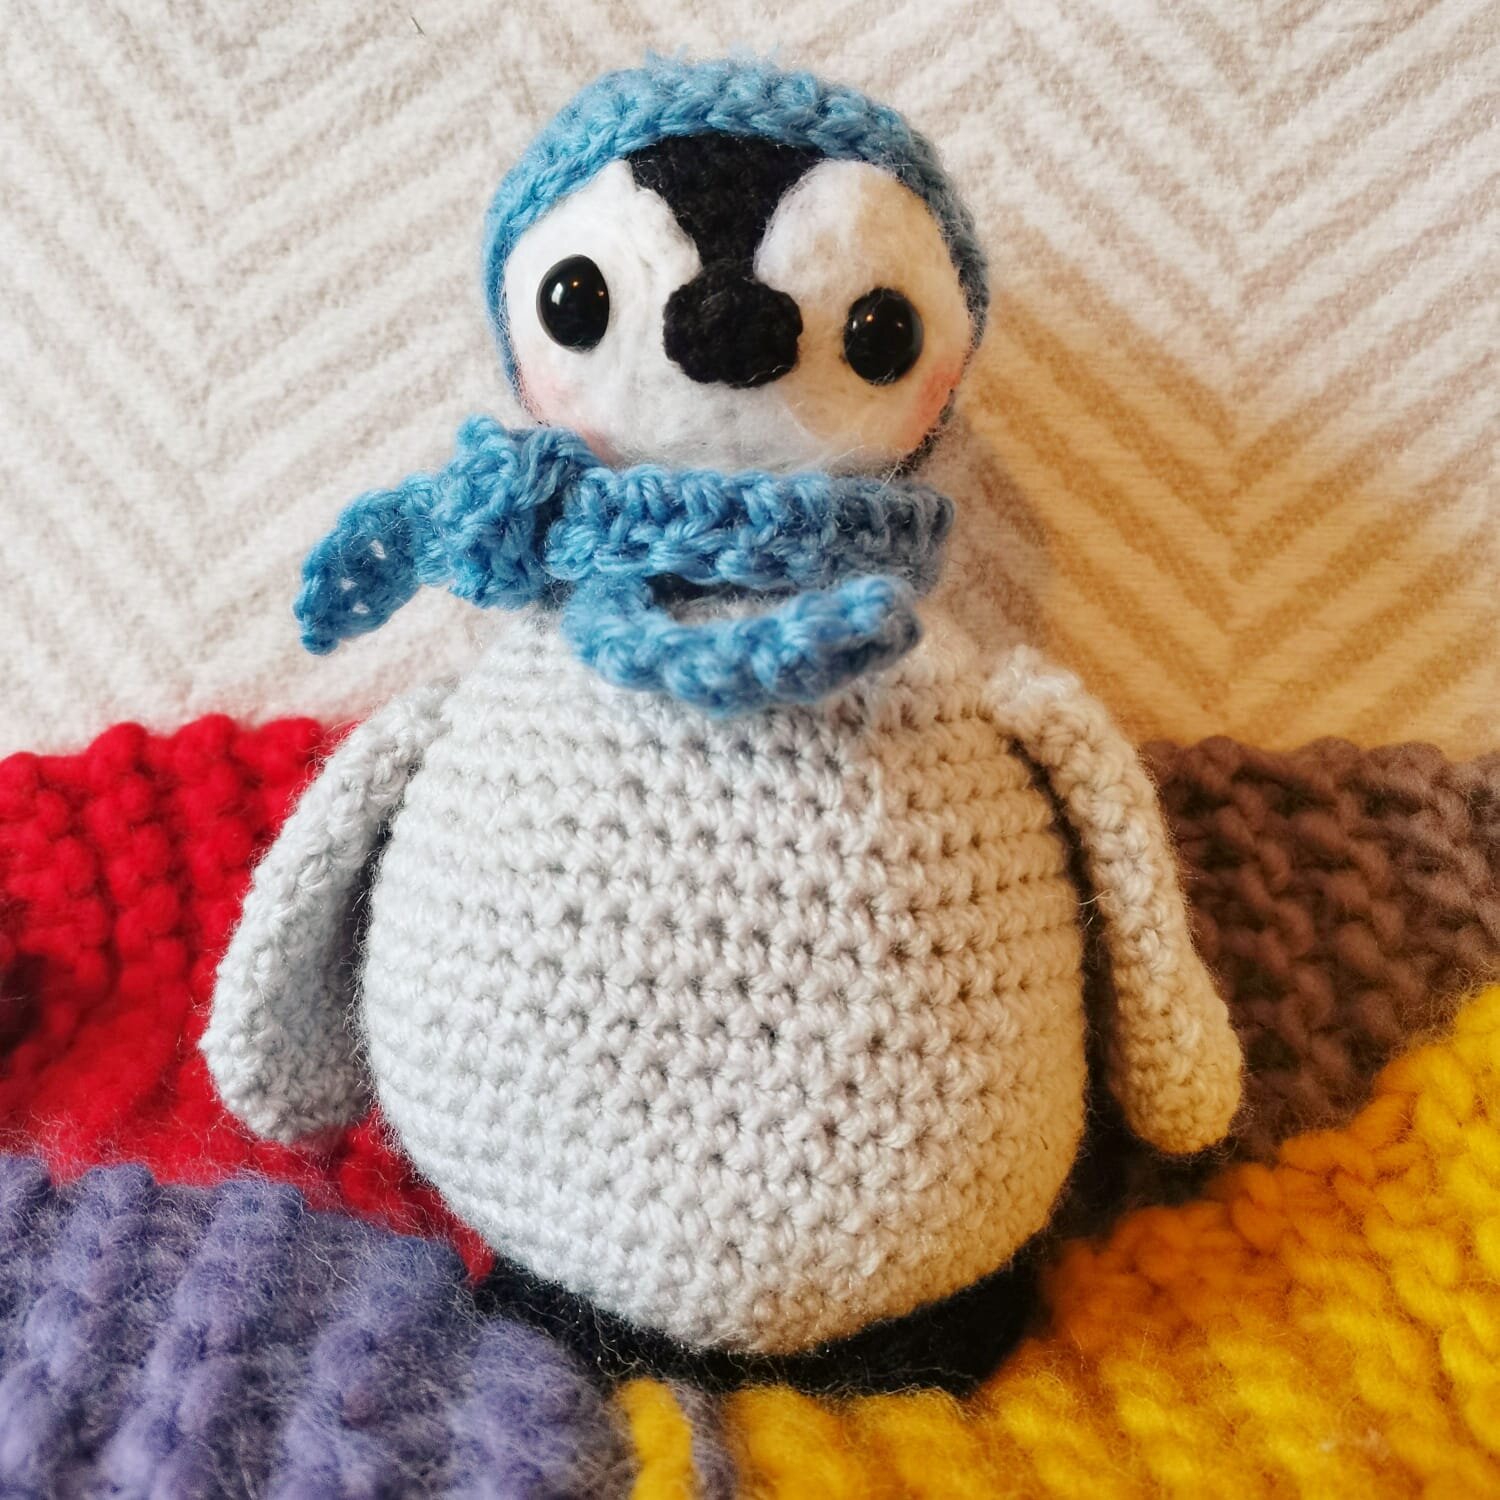
Baby penguin crochet amigurumi pattern
Before bunnies, my favourite animal were penguins. I love how chubby they are, their fluffy cute babies and March of the Penguins is 👌. This little friend was a gift for a friend but he’s perfect to get you through a few evenings in lockdown, as a festive ornament or as a Christmas gift for someone special, little or big.
Recommended yarn:
I enjoy using Stylecraft DK acrylic (here) or ricorumi cotton (here) but you can use any yarn you like. For this project I used a 3.25 mm hook with the Stylecraft DK.
Required materials:
1) Approx 50 g grey yarn (if using DK weight)
2) Black yarn of same weight
3) White felting wool and felting needle
5) Yarn for hat and scarf (use same yarn weight as the penguin)
6) Toy stuffing
7) Tapestry needle for sewing together
8) 10 mm toy safety eyes
Techniques used:
Note: This pattern uses US crochet terms (single crochet refers to double crochet in UK terms).
1) Single crochet (SC)
2) Magic ring (if you prefer you can chain 6 and slip stitch the first and last stitch)
3) Increase (Inc)
4) Decrease (Dec)
5) Chain
6) Double crochet
7) Weave in ends and finish
Reading the pattern:
The baby penguin is made of 6 separate parts which are then sewn together. The body and head are crocheted as a single piece and the wings, feet, hat and scarf are The pattern has been split into body parts with the number of each component required specified before the instructions. The number of stitches you should have at the end of each round is indicated by () after the round instructions.

Let’s go!
Body & head
Round 1: MR 6 (6)
Round 2: Inc x 6 (12)
Round 3: (SC 1, inc) x 6 (18)
Round 4: (SC 2, inc) x 6 (24)
Round 5: (SC 3, inc) x 6 (30)
Round 6: (SC 4, inc) x 6 (36)
Round 7: (SC 5, inc) x 6 (42)
Round 8: (SC 6, inc) x 6 (48)
Round 9: (SC 7, inc) x 6 (54)
Round 10 - Round 19 (10 rounds) : SC all (54)
Round 20: (SC 7, dec) x 6 (48)
Round 21: SC all (48)
Round 22: (SC 6, dec) x 6 (42)
Round 23: SC all (42)
Round 24: (SC 5, dec) x 6 (36)
Round 25: (SC 4, dec) x 6 (30)
Round 26: SC all (30)
Round 27: (SC 3, dec) x 6 (24)
Round 28: (SC 2, dec) x 6 (18)
Switch to black yarn
Round 29: SC all (18)
Round 30: (SC 2, inc) x 6 (24)
Round 31: (SC 3, inc) x 6 (30)
Round 32: (SC 4, inc) x 6 (36)
Round 33: (SC 5, inc) x 6 (42)
Round 34 - Round 38 (5 rounds): SC all (42)
Round 39: (SC 5, dec) x 6 (36)
Round 40: (SC 4, dec) x 6 (30)
Place safety eyes between rows 35 and 36, 8 stitches stitches apart.
Round 41: (SC 3, dec) x 6 (24)
Round 42: (SC 2, dec) x 6 (18)
Round 43: (SC 1, dec) x 6 (12)
Round 44: Dec x 6 (6)
Sew to close

Using your white felting wool, make the white patch on the penguins face in the shape as shown in the pictures. Be generous with the amount of felting wool you use - it’ll look much better if you are!
Wings (make 2)
In grey
Round 1: MR (6)
Round 2: Inc x 6 (12)
Round 3: (SC 2, inc) x 4 (16)
Round 4 - Round 6 (3 rounds): SC all (16)
Round 7: Inc x 2, SC 6, inc x 2, SC 6 (20)
Round 8 - round 14 (7 rounds): SC all (20)
Sew or slip stitch to close.
Feet (make 2)
In black
Round 1: MR (6)
Round 2: (Inc x 3 in the same stitch, SC 1) x 3 (12)
Round 3: SC 1, inc, SC x 3, inc, SC x 3, inc, SC x 2 (15)
Round 4: (SC 4, inc) x 3
Tie off.
Hat
In the colour of your choice
Round 1: MR 8 (8)
Round 2: Inc x 8 (16)
Round 3: (SC 1, inc) x 8 (24)
Round 4: (SC 2, inc) x 8 (32)
Round 5 - Round 6 (2 rounds): SC all (32)
Round 7: (SC 6, dec) x 4 (28)
Round 8 - Round 9: DC all (28)
Slip stitch to tie off.
To make the bobble, tie small strands of yarn into the MR you made in round one. Once you have a good amount, cut them all the same length.
Scarf
In the colour of your choice
Round 1: Chain 50. Turn
Round 2: DC in every stitch (49)
Tie off.
Nose
Round 1: MR 8
Slip stitch to join
Assembly
Sew together as shown below.
For a finishing touch, use a little blusher on your penguini’s cheeks to make them rosy or using a q-tip brush red ink (from a felt-tip) onto it’s cheeks.


You’re finished ❤
Hope you enjoyed this amigurumi pattern! If you post any of your makes on Instagram, please tag me in your posts- I’d love to see.
Please don’t copy or republish this pattern. Feel free to sell your makes but please credit me as the pattern author.
Abbie xo