

Bunny Beanie knitting pattern
Beginner friendly, easy peasy beanie knitting pattern.
A beginner friendly, super chunky beanie pattern which is a quick and easy knit if you’re just starting out or wanting to use up some chunky yarn in your yarn stash.
Difficulty - Beginner - advanced beginner
Techniques used -
1) Knit
2) Purl
3) Cast on
4) Knit two together (K2TOG)
5) Optional colour work
Needles required - 10 mm circular needles (40 cm in length)
Yarn - Approx 100 g (65 m) of Lauren Aston designs super chunky merino or similar (here).
This beanie is knit in the round so there is no seaming required! If you need your hat to be slightly bigger, cast on an even number more stitches and just follow the pattern as stated but add an extra K2TOG on the last round. You can make this on straight needles if you’re not confident with circular needles but instead you’ll have to purl alternative rows when you reach the stockinette stitch.

Bunny Beanie made with cinnamon yarn from Lauren Aston Designs using a 2 x 2 rib rather than 1 x 1 rib.
On y va!
Cast on 44 stitches using the long tail cast on method (or method of your choice but I recommend one which allows stretch).
I suggest placing a stitch marker at the beginning of your round.
Knit 14 rows in 1 x 1 rib - that is knit one stitch, purl one stitch until the end of the row.
Knit 14 rows.
Row 29: Knit 2, K2TOG x 11 (33 stitches)
Row 30: Knit 1, K2TOG x 11 (22 stitches)
Row 31: K2TOG x 11 (11 stitches)
Cut your working yarn leaving a tail of about 10 cm. Using a darning needle, thread your yarn back through the stitches you have just worked so they’re being held by the yarn rather than your needles. Pull gently to close the hole. Pass the yarn through the closed hole and sew into alternative stitches on the last round (i.e. the stitches you just passed your yarn through) and tie off.
Optional colour work
The colour work is completely optional but is simple and easy to do if you’ve never done colour work before.

After the 14 rows of 1 x 1 rib stitch, knit 3 rows. Knit the first stitch of the round in your contrasting colour, knit the second in your main colour and repeat until the end of the row. Knit the next row in your main colour. For the next row, knit the first stitch in your main colour, the next in your contrasting colour and repeat until the end of the row. Knit the next row in your main colour. Repeat these 4 rows until you’ve done all the colour work you want - I recommend doing the decrease rows only in your main colour. Follow the rest of the pattern as written.
PomPom - The pompom is again optional but it looks really cute. I recommend a large pompom maker but you can use whatever size and pompom method you like. Consider using both your main colour and contrast colour(s) in your pompom!
That’s it! It’s really simple but looks really cute and is super warm and snug.
If you need any guidance please do ask for help - I’m always happy to talk about knitting!
Enjoy the pattern and if you do make a bunny beanie, please tag me in your makes! I’d love to see it!
Abbie xo

Seaside chunky cardi knitting pattern
Free Seaside chunky knitted cardigan pattern
Perfect for a beginner knitter.
A chunky knitted cardigan perfect for beginner knitters

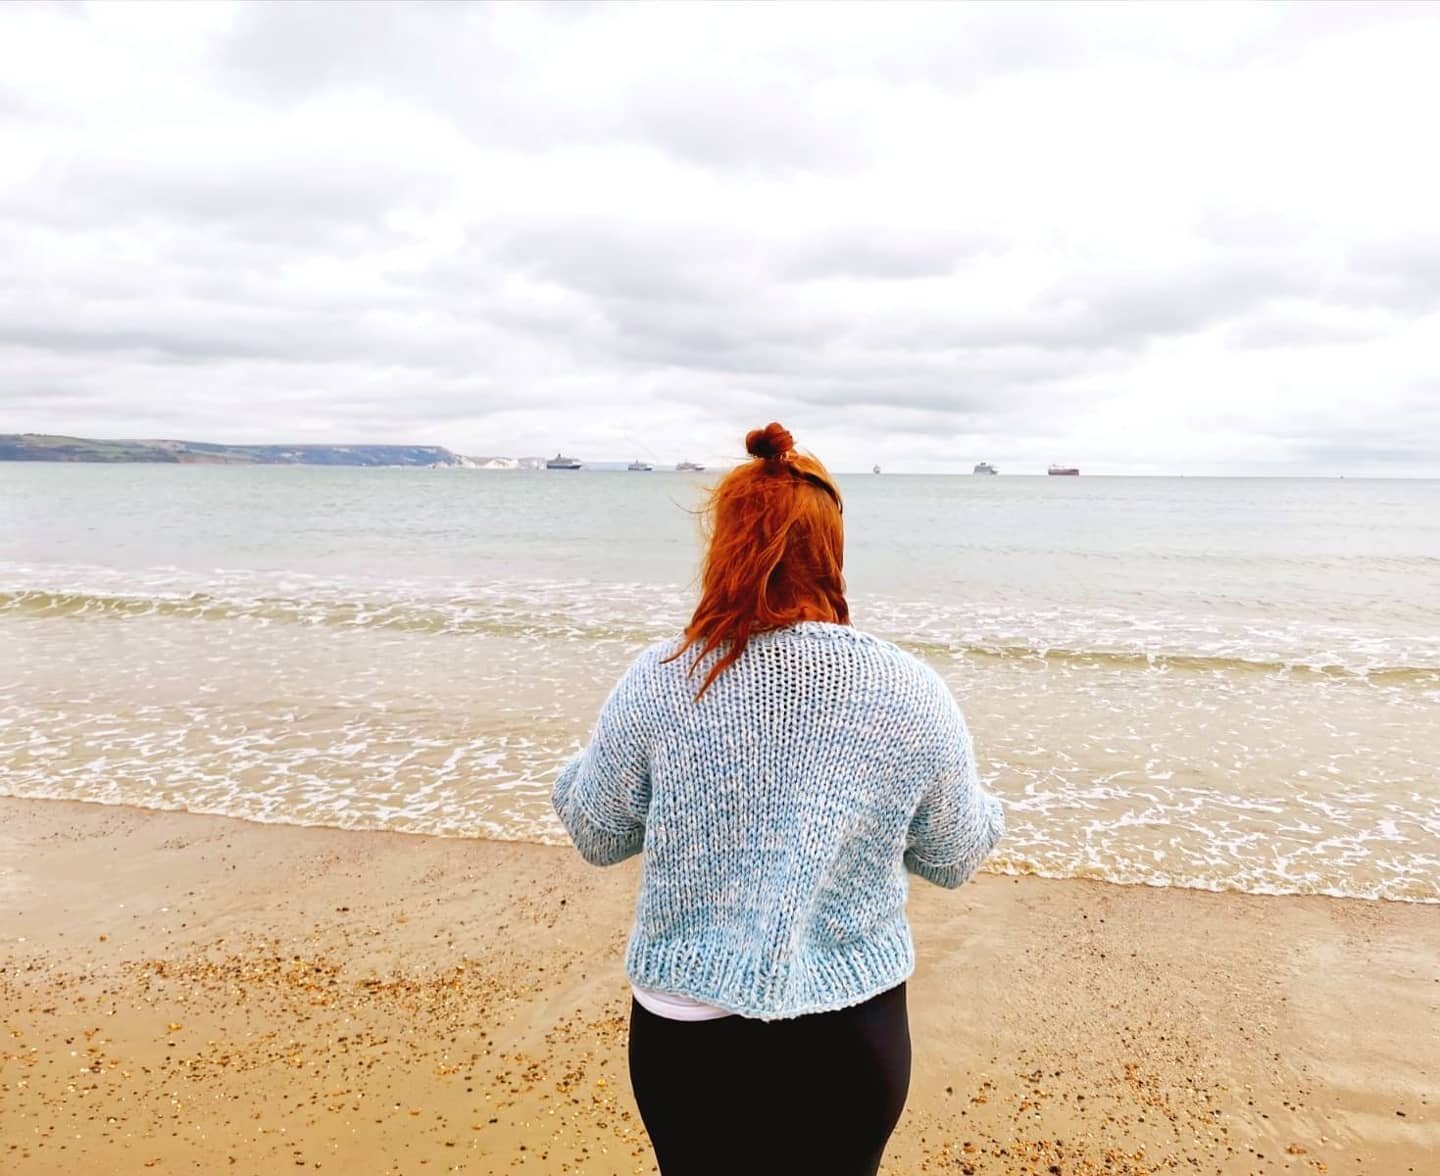
Welcome to the Seaside chunky knitted cardigan pattern. I knitted this whilst on a trip to the Jurassic Coast and it will always remind me of Durdle Door and Weymouth where I spent a lot of time as a child. It is designed to be worn open and slightly oversized and the size is easily adjustable if you’re tall, short or just fancy something a little off-piste.
This cardigan is super cosy, chunky and perfect for beginner knitters.
Difficulty - Advanced beginner (Can you knit a hat? If so, you can make this cardi!)
Techniques used
1) Knit
2) Purl
3) Knit two together decrease (K2TOG)
4) Pick up stitches
5) Cast on
6) Cast off
7) Mattress stitch and perpendicular and horizontal seaming
8) 1 x 1 rib (knit one, purl one)
Needles required - 10 mm and 12 mm straight knitting needles
Suggested yarn -
John Lewis 100 % wool chunky yarn (shop here) knitted together with Rowan Alpaca Classic DK yarn (shop here).
Note: This yarn was a payday treat and fairly expensive but it is lovely, soft and squishy. I’ve listed some suitable alternatives below but please do check tension if using a different yarn!
Alternative yarns -
Paintbox Yarns Simply Super Chunky 100 % acrylic (click here)
Rowan Big Wool 100 % Merino wool (click here)
Rico Essentials Super Super Chunky 50 % acrylic 50 % wool (click here)
This pattern currently has not been tested for all sizes. I made mine in a size medium and scaled it up and down with some simple maths therefore yardage is approximate. If you have any comments or feedback of this pattern I would love to hear from you!
Please note: I have tried to cover a range of sizes however if you feel none of these are right for you, please do contact me and I'd be happy to work out stitch counts and yardage so you can enjoy this pattern! Writing patterns is still new to me so this is very much a learning process.
The cardigan is knitted up flat on straight needles in five parts and sewn together using mattress stitch. Stitches are then picked up along the fronts and neckline and knitted in 1 x 1 rib. As it is knitted flat, the size is very easily adjustable.
Measurements and stitch counts are indicated as below - Stitch counts are indicated in size order so make sure to follow your size.
Sizes:
XS, (S), M, (L), XL, (2XL), 3XL
Measurements:

Seaside Cardigan measurements
Measurements are all in cm
A - Cardigan length - 48, (50), 52, (54), 56, (58), 60 (If you want your cardigan slightly shorter or longer, simply knit more or fewer rows. Remember to knit the same number of rows for the front panels).
B - Width across the back piece - 56, (65), 74, (82), 92, (100), 110
C - Arm length - 30, (30), 32, (32), 34, (34), 36
D - Width of front panel - 15.5, (19), 22.5, (25), 28, (31), 34
E - Circumference of sleeve at top of arm - 37.5, (40), 42.5, (45), 47.5, (50), 52.5
Tension:
For 10 cm x 10 cm - 8 stitches x 10 rows (Please check tension!!)
Yarnage:
355 m, (400 m), 450 m, (520 m), 580 m, (620 m), 670 m of super chunky yarn using 12 mm needles.
These are approximate - if you need to increase the length of the body or sleeves, you’ll need more yarn.
Back
1) Cast on 38, (44), 50, (56), 62, (68) 74 stitches using the 12 mm needles.
2) Knit one row.
3) Purl one row.
4) Repeat steps 2 and 3 until you have 48, (50), 52, (54), 56, (58), 60 rows. If you want your cardigan to be longer, keep knitting but please note the number of extra rows to make sure your front pieces are the same length as the back. Yarnage will also need to be increased.
5) Knit 6 rows in 1 x 1 rib (This is to knit one stitch, purl one stitch and repeat until end). As you have an even number of stitches you should always start these rows with a knit stitch.
6) Cast off.
Front (make two):
1) Cast on 10, (12), 14, (16), 18, (20), 22 stitches.
2) Knit one row.
3) Purl one row.
4) Repeat steps 2 and 3 until you have 48, (50), 52, (54), 56, (58), 60 rows.
5) Knit 6 rows in 1 x 1 rib.
6) Cast off.
Arms (make two)
1) Cast on 30, (32), 34, (36), 38, (40), 42 stitches.
2) Knit one row.
3) Purl one row.
4) Repeat steps 2 and 3 until you have 30, (30), 32, (32), 34, (34), 36 rows. Please note the decreases below.
Decreases: Knit the 2nd and 3rd stitches and then the 3rd and 2nd stitches from the end of the row together.
XS and S: Decrease on rows 5, 11, 17 and 21.
M and L: Decrease on rows 5, 11, 13, 17, 21 and 27.
XL: Decrease on rows 5, 11, 13, 17, 22, 27 and 31.
2XL and 3XL: Decrease on rows 5, 11, 13, 17, 19, 21, 27 and 33.
5) Knit two stitches, K2TOG until the end of the row.
You now have 22, (24), 22, (24), 24, (24), 26 stitches.
6) Using 10 mm needles, Knit 6 rows of 1 x 1 rib.
7) Cast off.
Stitching together
The cardigan is sewn together using mattress stitch, the perpendicular and horizontal seaming technique. Check out my post (here) about the best tutorials I’ve found for help!
1) Starting from the edges, sew the back and the two front pieces together using the horizontal seaming technique.
2) Lining up the stitches carefully, sew the top of the arm to the back and body pieces using the perpendicular seaming technique. Repeat for both arms.
3) Starting at the 1 x 1 rib at the wrist sew up the arm and down the body using mattress stitch.
4) Repeat for both arms.
Front ribbing
1) Starting at the bottom of the right front panel (the right as if you were wearing the cardigan), pick up every other stitch with your 12 mm needle. Make sure you pick up the last stitch of the left front panel even if it’s not ‘the other stitch’.
2) Knit 3 rows in 1 x 1 rib.
3) Cast off.
Weave in all ends and block if necessary.
I added three buttons just for effect however as the knit is chunky, buttons should fit in between the stitches so button holes are not required.
All done!
Congrats on finishing your seaside chunky knit cardigan! I hope you enjoyed this pattern and if you have any questions or get stuck at any point, please do message me either at abbieknits@gmail.com or on instagram @abbieknits.

Please do tag me in anything you make - I’d love to see your Seaside Cardigans out in the wild!
Abbie xo