

Mission Statement
Mission Statement for Abbie Knits. Why my patterns are free and what I hope to create.

A mission statement sounds very fancy but really, I’m just here to talk about how I started Abbie Knits and why I’m doing the things I’m doing in the way that I’m doing them.

I started knitting (properly) in 2015 when I found a knitting shop close to my house in Leicester and fancied making something one weekend. I went into the shop, picked something I liked with some appropriate straight needles and thought yeahhhhh I can knit a scarf. Turns out I couldn’t and I frogged it many many times until I finally made something acceptable to be shown to people and gifted it to my sister.
After that I felt very ambitious and found a men’s sweater pattern on the internet, went into the same shop and chose some wool I liked regardless of fibre, weight or whether the yarn was suitable for the pattern. The owner of the shop was horrified that this was something I might do and told her I had found a yarn calculator and that everything would be fine. It was a bit naïve but at the time, most of the patterns I could find were old fashioned, complicated and not at all like what I wanted to create.
So a while later after knitting a little here and there and a couple of Christmas jumpers later, I experienced heartbreak and found myself picking up my needles whenever I had free time and my obsession really began. I found Wool Warehouse, Love Crafts and Ravelry and realised the world of yarn was much bigger than the tiny old ladies’ shop in Leicester and Wool and The Gang (although WATG is still a firm favourite!). On a visit to see my sister in Belfast, we met a lovely lady called Victoria (@Pictureofgrace) at St George’s market who makes amazing amigurumi and this is when I decided to learn to crochet. I joined the lunchtime crafty club at work and went subsequently went through a Toft obsession (we’ve all been there….) and it was around this time a friend suggested I put everything I made on Instagram and Abbie Knits was born.
Throughout this little crafty (hate to say it- sorry) journey, I’ve made lots of errors, frogged lots of things, thrown half finished squishy friends away because I couldn’t deal with unravelling them but I’ve got to the point where I can pretty much make anything I want. And that’s why I made this site.

Being a beginner crafter (here we’re talking about knitting and crocheting) can be a bit daunting and also expensive - you have to buy the yarn (there are so many lesser appreciated smaller affordable brands) the pattern and then the needles, the stitch markers and anything you else you thought you might need because you got a bit excited browsing LoveCrafts. But it is wonderful. It allows you to be creative, to slow down and you’re more connected with the things you create than if you went out and bought said something. And that ultimately is more sustainable for not only the planet, but for your bank balance and it’s excellent for your mental health.
We need to make a move away from fast fashion and we need to do it now. The industry is driven by profits and won’t change without pressure from the consumer. The most effective thing we can do? Make our own items and stop buying. Of course, it is much more complicated than that, but ultimately the items we make will be better quality, have a lower carbon footprint, longer lasting and communities haven’t been exploited in the process. I’m a scientist who cares deeply for the future of our planet and I’m also a crafter who believes in the maker movement and this is why this site exists.
Through Abbie Knits I want to share accessible, free and easy to understand patterns so you can make whatever it is that you want (apart from socks - I’m never knitting socks!). I want to be part of a maker community that is diverse, inclusive and friendly and I hope you want to be part of it too! On a personal note, this website is also a great way for me to document what I make and it’ll become my online knitting library.
I hope you enjoy the website and please do get in touch if you need help with patterns, if you have an idea you want to share, feedback from anything you make or just if you want a chat - not restricted to crafting!
Thankyou and lots of crafty love,
Abbie xo

Abbie and Coral feeling very happy in their hand knitted jumpers- albeit one of them being very ugly.

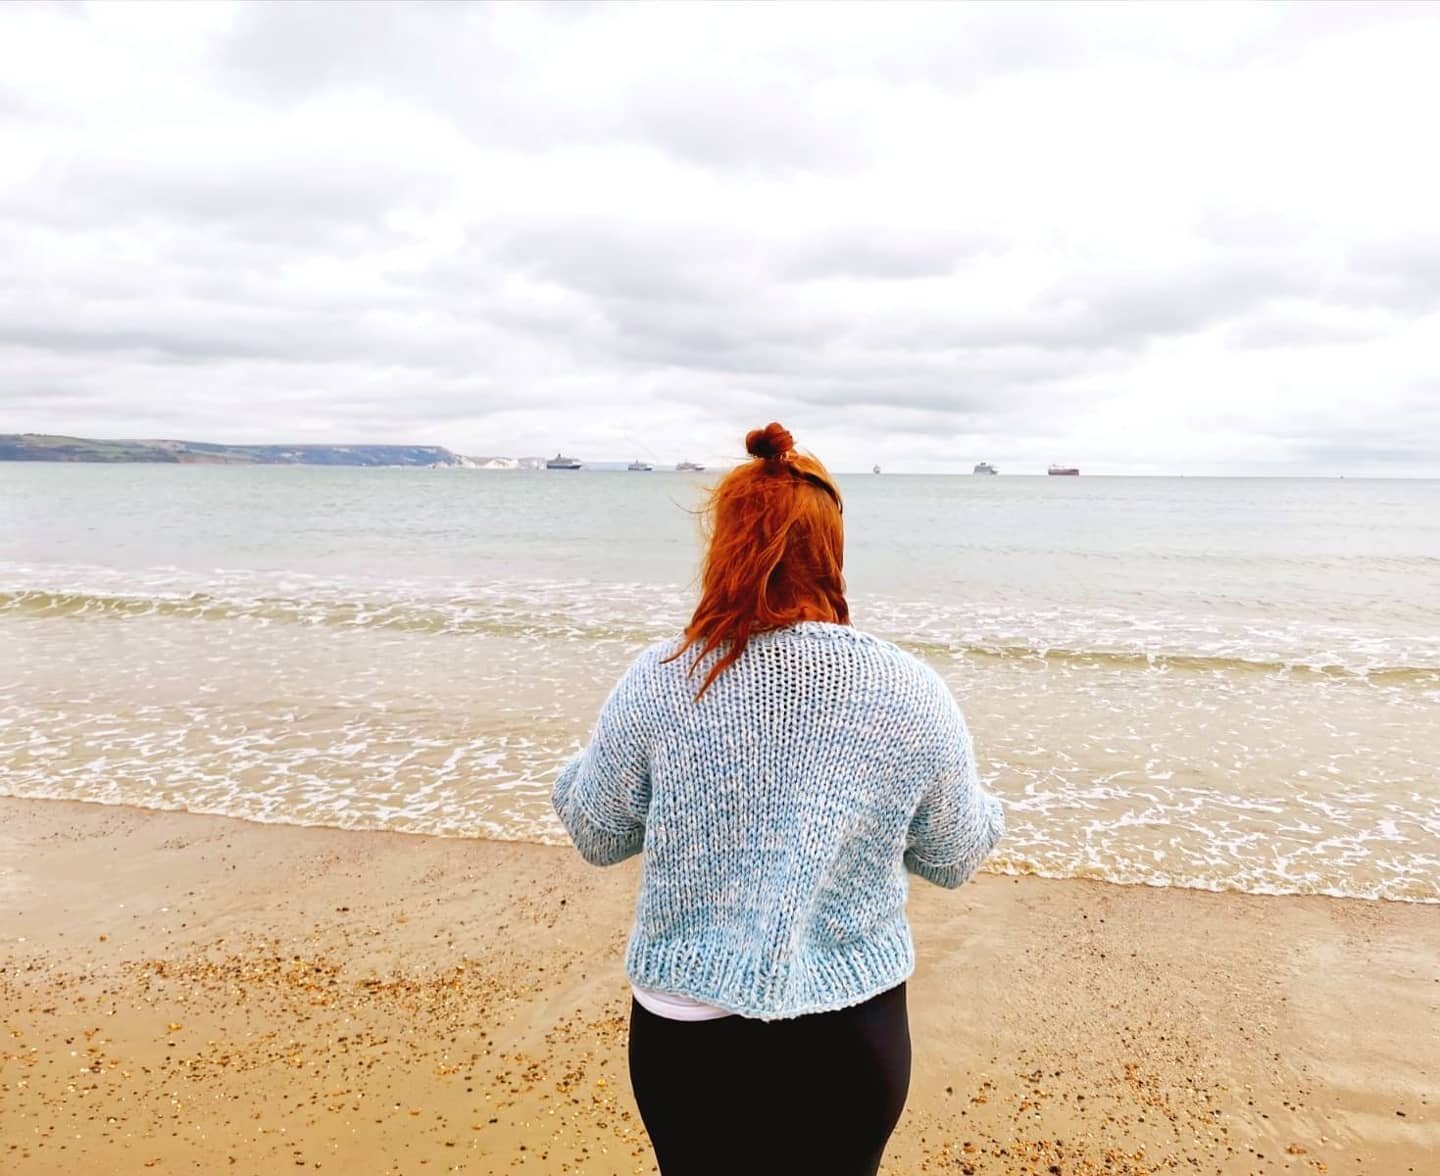
Seaside chunky cardi knitting pattern
Free Seaside chunky knitted cardigan pattern
Perfect for a beginner knitter.
A chunky knitted cardigan perfect for beginner knitters

Welcome to the Seaside chunky knitted cardigan pattern. I knitted this whilst on a trip to the Jurassic Coast and it will always remind me of Durdle Door and Weymouth where I spent a lot of time as a child. It is designed to be worn open and slightly oversized and the size is easily adjustable if you’re tall, short or just fancy something a little off-piste.
This cardigan is super cosy, chunky and perfect for beginner knitters.
Difficulty - Advanced beginner (Can you knit a hat? If so, you can make this cardi!)
Techniques used
1) Knit
2) Purl
3) Knit two together decrease (K2TOG)
4) Pick up stitches
5) Cast on
6) Cast off
7) Mattress stitch and perpendicular and horizontal seaming
8) 1 x 1 rib (knit one, purl one)
Needles required - 10 mm and 12 mm straight knitting needles
Suggested yarn -
John Lewis 100 % wool chunky yarn (shop here) knitted together with Rowan Alpaca Classic DK yarn (shop here).
Note: This yarn was a payday treat and fairly expensive but it is lovely, soft and squishy. I’ve listed some suitable alternatives below but please do check tension if using a different yarn!
Alternative yarns -
Paintbox Yarns Simply Super Chunky 100 % acrylic (click here)
Rowan Big Wool 100 % Merino wool (click here)
Rico Essentials Super Super Chunky 50 % acrylic 50 % wool (click here)
This pattern currently has not been tested for all sizes. I made mine in a size medium and scaled it up and down with some simple maths therefore yardage is approximate. If you have any comments or feedback of this pattern I would love to hear from you!
Please note: I have tried to cover a range of sizes however if you feel none of these are right for you, please do contact me and I'd be happy to work out stitch counts and yardage so you can enjoy this pattern! Writing patterns is still new to me so this is very much a learning process.
The cardigan is knitted up flat on straight needles in five parts and sewn together using mattress stitch. Stitches are then picked up along the fronts and neckline and knitted in 1 x 1 rib. As it is knitted flat, the size is very easily adjustable.
Measurements and stitch counts are indicated as below - Stitch counts are indicated in size order so make sure to follow your size.
Sizes:
XS, (S), M, (L), XL, (2XL), 3XL
Measurements:

Seaside Cardigan measurements
Measurements are all in cm
A - Cardigan length - 48, (50), 52, (54), 56, (58), 60 (If you want your cardigan slightly shorter or longer, simply knit more or fewer rows. Remember to knit the same number of rows for the front panels).
B - Width across the back piece - 56, (65), 74, (82), 92, (100), 110
C - Arm length - 30, (30), 32, (32), 34, (34), 36
D - Width of front panel - 15.5, (19), 22.5, (25), 28, (31), 34
E - Circumference of sleeve at top of arm - 37.5, (40), 42.5, (45), 47.5, (50), 52.5
Tension:
For 10 cm x 10 cm - 8 stitches x 10 rows (Please check tension!!)
Yarnage:
355 m, (400 m), 450 m, (520 m), 580 m, (620 m), 670 m of super chunky yarn using 12 mm needles.
These are approximate - if you need to increase the length of the body or sleeves, you’ll need more yarn.
Back
1) Cast on 38, (44), 50, (56), 62, (68) 74 stitches using the 12 mm needles.
2) Knit one row.
3) Purl one row.
4) Repeat steps 2 and 3 until you have 48, (50), 52, (54), 56, (58), 60 rows. If you want your cardigan to be longer, keep knitting but please note the number of extra rows to make sure your front pieces are the same length as the back. Yarnage will also need to be increased.
5) Knit 6 rows in 1 x 1 rib (This is to knit one stitch, purl one stitch and repeat until end). As you have an even number of stitches you should always start these rows with a knit stitch.
6) Cast off.
Front (make two):
1) Cast on 10, (12), 14, (16), 18, (20), 22 stitches.
2) Knit one row.
3) Purl one row.
4) Repeat steps 2 and 3 until you have 48, (50), 52, (54), 56, (58), 60 rows.
5) Knit 6 rows in 1 x 1 rib.
6) Cast off.
Arms (make two)
1) Cast on 30, (32), 34, (36), 38, (40), 42 stitches.
2) Knit one row.
3) Purl one row.
4) Repeat steps 2 and 3 until you have 30, (30), 32, (32), 34, (34), 36 rows. Please note the decreases below.
Decreases: Knit the 2nd and 3rd stitches and then the 3rd and 2nd stitches from the end of the row together.
XS and S: Decrease on rows 5, 11, 17 and 21.
M and L: Decrease on rows 5, 11, 13, 17, 21 and 27.
XL: Decrease on rows 5, 11, 13, 17, 22, 27 and 31.
2XL and 3XL: Decrease on rows 5, 11, 13, 17, 19, 21, 27 and 33.
5) Knit two stitches, K2TOG until the end of the row.
You now have 22, (24), 22, (24), 24, (24), 26 stitches.
6) Using 10 mm needles, Knit 6 rows of 1 x 1 rib.
7) Cast off.
Stitching together
The cardigan is sewn together using mattress stitch, the perpendicular and horizontal seaming technique. Check out my post (here) about the best tutorials I’ve found for help!
1) Starting from the edges, sew the back and the two front pieces together using the horizontal seaming technique.
2) Lining up the stitches carefully, sew the top of the arm to the back and body pieces using the perpendicular seaming technique. Repeat for both arms.
3) Starting at the 1 x 1 rib at the wrist sew up the arm and down the body using mattress stitch.
4) Repeat for both arms.
Front ribbing
1) Starting at the bottom of the right front panel (the right as if you were wearing the cardigan), pick up every other stitch with your 12 mm needle. Make sure you pick up the last stitch of the left front panel even if it’s not ‘the other stitch’.
2) Knit 3 rows in 1 x 1 rib.
3) Cast off.
Weave in all ends and block if necessary.
I added three buttons just for effect however as the knit is chunky, buttons should fit in between the stitches so button holes are not required.
All done!
Congrats on finishing your seaside chunky knit cardigan! I hope you enjoyed this pattern and if you have any questions or get stuck at any point, please do message me either at abbieknits@gmail.com or on instagram @abbieknits.

Please do tag me in anything you make - I’d love to see your Seaside Cardigans out in the wild!
Abbie xo